Monday, December 9, 2013

Unable to Open Outlook 2003 Error: "MAPI32.DLL is corrupt or the wrong version"

Received a phone call this morning where the user received the following error message trying to open Outlook 2003.

Error:  Cannot start Microsoft Office Outlook.  MAPI32.DLL is corrupt or the wrong version.  This could have been caused by installing other messaging software.  Please reinstall Outlook.

Fix for this issue.

  1. Find the file MSMapi32.dll.
  2. Which should be located in - C:\Program Files\Common Files\System\Msmapi\1033\.
  3. Rename the file to MSMapi32.old
  4. Click on the Outlook icon and the program should repair itself and replace the file with the correct version.

Monday, November 25, 2013

Creating a Basic Virtual Machine in with Windows 8 Hyper-V

One of the neat features of Windows 8 Pro is the included client Hyper-V software.  While it may be a tad limited compared to the server Hyper-V(details can be found here), it can still be used as a great tool for creating virtual machines (VM) for testing, developing, etc.  Today, I will show you how to create a basic VM in Hyper-V.

Note:  You must have virtualization enabled in the BIOS, and have the Hyper-V feature enabled in Programs and Features.

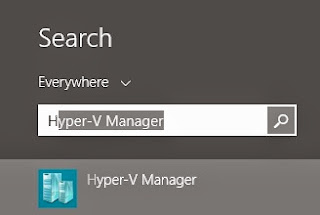
First, open up Hyper-V Manager.  You can find it easily by doing a search for Hyper-V in the Start screen.


With Hyper-V open, click New, then Virtual Machine under the Actions menu.


On the Before You Begin screen, click Next.


On the Specify Name and Location screen, enter in a name for the VM in the Name box, and select a location to store the VM in.  You can leave it to the default location (can be configured in the Hyper-V Server Settings), or you can override the default location by placing a check in the "Store the virtual machine in a different location" checkbox, and entering in a new path.  For my example, I chose "C:\Virtual".  Click Next.


 Next, choose what generation you would like your VM to be.  Note that most OS's pre-Windows8/Server 2012 are not supported as a Generation 2 VM.  I selected Generation 1 for this example.  Click Next.
Note:  There are no supported ways of changing the generation of a VM.


On the Assign Memory screen, type in the amount of memory you would like to assign to this machine.  You can also choose "Dynamic Memory" (memory adjusts as needed) as well, but I left that unchecked for this VM.  I chose 1024MB (or 1GB).  Click Next.


On the Configure Networking, select any pre-configured connection, or leave it as none.  I already had an "external" connection configured, so I selected that one.  Click Next.


On the Connect Virtual Hard Disk screen, you have the option of creating a new virtual disk, selecting an existing virtual disk, or attaching one later.  I chose to create a new virtual disk, and kept the default settings.
Note:  When selecting a new virtual disk, it automatically creates a dynamic VHDX disk.  If you want a fixed disk or a VHD disk, you will want to select "Attach a virtual hard disk later" and create a new disk after the VM setup.


If you chose to create a new virtual disk, the next screen will allow you to install a OS later, or now from a bootable drive (physical disc, .iso, or .vfd), or from a network-based installation server.  I chose to install an OS later.  Click next when you have selected your choice.


The last screen will present you with summary of all the settings for your new VM.  If everything looks correct, click Finish.

If the VM was created successfully, you should see it listed under Virtual Machines.


For my next blog post, I will show you how to customize a few of the virtual machine settings, and install a OS from an ISO.  Stay tuned!

Monday, November 18, 2013

Email Fishing For Information

Recently we received a fake email where they are fishing for information.  Highlighted below you can see that the antivirus system removed the infected attachment and email address has nothing to do with ADP.   Companies like ADP understand cybercrime and have setup a security alert website with current alerts on the email like the one below.

http://www.adp.com/about-us/trust-center/security-alerts.aspx

On the ADP website, they explain how to report an incident.  Most people should know NOT to OPEN ATTACHMENT or CLICK ON THE LINKS.  After forwarding the email to the correct people(in this case abuse@adp.com) DELETE it.

If you uncertain about an email, search google.com for the sender / subject of the email.  If it is a bad / fake email you will see the search results keywords like security alert, malware, fake email etc.  Again DO NOT CLICK ON ATTACHMENTS or LINKS. Notify your IT staff and DELETE IT.


Friday, November 8, 2013

Setup iCloud backup on iOS 7

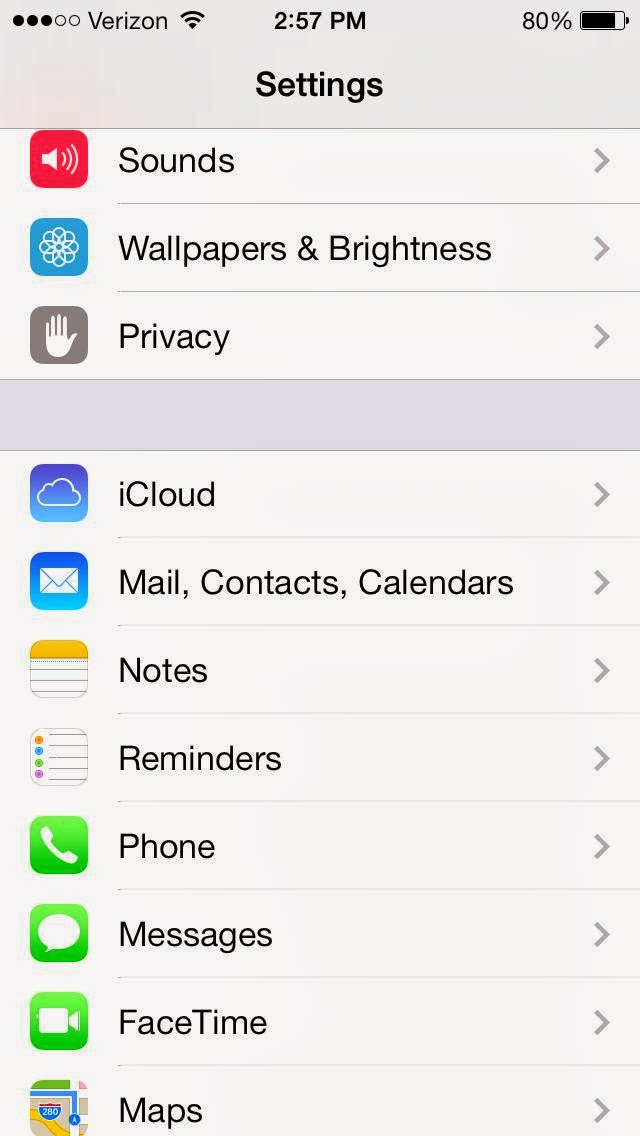
1. Click on the "Settings" icon and it will bring you to this menu:


2. Click on "iCloud".


3. Click on "Storage & Backup".


4. It will then ask you for you Apple ID (the e-mail address you used to setup your phone.) After you typed the username and password, iCloud backup will be enabled. It will backup automatically every night when plugged into power and connected to WIFI. You can also do a manual backup by selecting "Back Up Now".


Monday, May 20, 2013

Creating an Email Signature in Outlook Web App (OWA) 2010

Last time, I showed you how to create a signature in Microsoft Outlook 2013.  Now, I'm going to show you how to create a signature in Outlook Web App (OWA) 2010.  Now since OWA is a stripped-down version of Outlook, the signature functionality is pretty limited.  You only have the option for one signature, and it will be automatically added to every new message and reply you create.

1.  First thing's first; browse to your company's OWA site, and log in with your credentials.


2.  After you get logged in, click "Options" in the upper-right corner, right below your name.  Click See All Options" from this menu.


3.  You should see a menu on the left side of the window now.  Click "Settings".


4.  With Settings open, you should be greeted with a "E-Mail Signature" editor in the center of the window.  Enter your information in the text box, and style/format your signature to your liking.  Once you are finished, click "Save" in the lower right corner.  Simple as that!

Monday, May 13, 2013

Microsoft Account needed for Windows 8 Apps


I did not want to sign up for a new email address.  Instead, you can link your existing email to Microsoft Account.  Below is a link and screen shot of the Microsoft Account signup page.


https://signup.live.com/signup.aspx

Thursday, May 2, 2013

How to take a screenshot on an iPhone or other apple device.

1. If you want to take a screenshot on your phone, press the power and home button at the same time.
The screen will flash white when you know you have taken the screen shot.


2. If you then go to your photos on your idevice you can see the screenshot that you just took.