Note:
These instructions may vary slightly due to manufacturer modifications to the device.
1. Open your application list, and click Settings.
2. Scroll down to the Accounts section, and click Add Account.
3. Click Corporate.
4. Enter in your email address and email password. Click Next.
5. Enter/Verify the following information, then click Next.
- Domain\Username: domain\username
- Password: your windows/email password
- Server: usually mail.domainname.com
- Use secure connection (SSL): check with your system administrator
- Accept all SSL certificates: check with your system administrator
- Port: check with your system administrator (Usually 25 or 443)
6. On the Remote Security Administration screen, click OK.
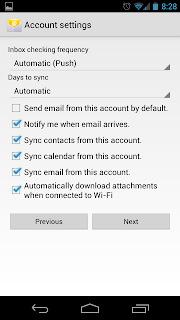
7. On the Account Settings screen, you can customize these settings to your liking. Usually the default settings work just fine for the average user. After you are done customizing, click Next.

8. Type in a name you would like for this email account (for example, Work). Click Next.
9. On the Activate Device Administrator screen, click Activate.
10. Setup should be finished. You should be receiving emails within a few minutes.


No comments:
Post a Comment